Formal Education: A Comprehensive Overview
Formal education is a systematic, planned process delivered by institutions, utilizing a structured curriculum and specially trained teachers for effective knowledge transfer.

Defining Formal Education
Formal education represents a hierarchically structured and chronologically graded system, extending from primary school through university levels. Crucially, it’s characterized by intentional, planned instruction delivered within public or recognized private institutions. This distinguishes it through a defined curriculum and, fundamentally, the presence of specially trained teachers.
These educators aren’t simply imparting information; they are professionals equipped with qualifications and pedagogical methodologies. Formal education is institutionalized, meaning it operates within a complex framework designed for knowledge transmission and skill development. It’s a deliberate process, unlike informal learning derived from everyday experiences, and differs from non-formal education’s flexible structure.
Historical Development of Formal Education Systems
Historically, formal education evolved from ancient civilizations’ temple schools and tutelage systems, initially reserved for elites and often reliant on masters passing knowledge directly. The emergence of universities in medieval Europe marked a shift towards institutionalized learning, though specially trained teachers were still relatively uncommon.
The 19th century witnessed the rise of compulsory, state-funded education, demanding a surge in teacher training. Normal schools and teacher colleges arose to professionalize instruction. This period solidified the role of the qualified educator as central to formal systems. Modern developments continue to refine teacher preparation, emphasizing pedagogical skills alongside subject matter expertise, ensuring effective knowledge delivery.
Key Characteristics of Formal Education
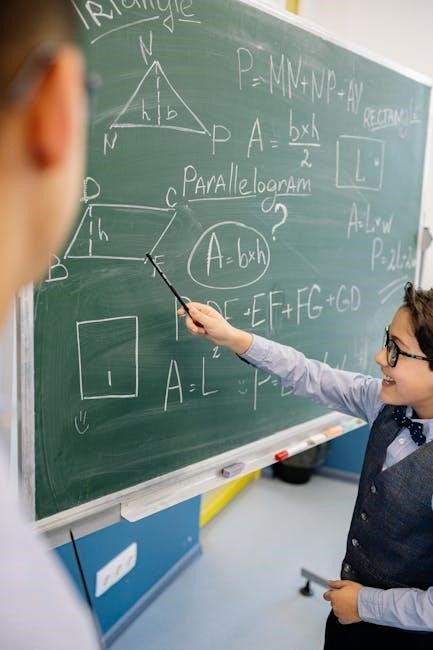
Formal education is fundamentally characterized by its structured, hierarchical organization, progressing through defined levels. A core feature is its intentionality – learning is deliberately planned and delivered. Crucially, it relies on specially trained teachers possessing qualifications and pedagogical expertise. This ensures consistent, standardized instruction aligned with established curricula.
Furthermore, formal systems emphasize assessment and evaluation to measure student progress. Institutionalization, with recognized bodies and certifications, is also key. This contrasts with informal learning, and highlights the deliberate, systematic nature of formal education guided by qualified professionals.
The Role of Specially Trained Teachers
Specially trained teachers are central to formal education, acting as facilitators of structured learning. They deliver planned curricula, assess student understanding, and foster character development. Their expertise ensures consistent, high-quality instruction across institutions. These educators aren’t simply knowledge providers; they employ pedagogical methodologies to cater to diverse learning styles.
Formal systems demand qualified instructors, often requiring specific certifications. This professionalization guarantees a standardized approach to teaching, vital for maintaining educational quality and achieving defined learning outcomes within the established framework;
Teacher Qualifications and Certification
Formal education necessitates that teachers possess specific qualifications, typically including a bachelor’s degree in education or a related field. Many systems require further specialized training and pedagogical coursework. Certification, often state or nationally mandated, validates a teacher’s competence and adherence to professional standards.
These credentials demonstrate mastery of subject matter, teaching methodologies, and classroom management techniques. Ongoing professional development is frequently required to maintain certification, ensuring teachers remain current with evolving educational practices and best practices for student success.
Teacher Training Methodologies
Formal education relies on diverse teacher training methodologies to prepare educators for effective instruction. Traditional approaches include university-based programs with theoretical coursework and supervised practicums, offering a foundation in pedagogy and subject matter. Increasingly, alternative certification programs provide pathways for individuals with subject expertise to enter teaching.
Modern methodologies emphasize practical experience, mentoring, and ongoing professional development. Techniques like microteaching, action research, and collaborative learning are employed to refine skills and foster reflective practice, ensuring teachers are well-equipped to meet diverse student needs.
Structure and Levels of Formal Education
Formal education exhibits a hierarchical structure, progressing through distinct levels delivered by specially trained teachers. It typically begins with primary education, establishing foundational literacy and numeracy skills. Secondary education expands knowledge, offering a broader curriculum and preparing students for higher learning or vocational pathways.
Tertiary education, encompassing colleges and universities, provides specialized instruction and advanced degrees. This structured progression, guided by qualified educators, ensures a systematic accumulation of knowledge and skills, fostering intellectual growth and preparing individuals for societal contributions.
Primary Education: Foundations of Learning
Primary education, the initial stage of formal education, lays crucial foundations delivered by specially trained teachers. This level focuses on basic literacy, numeracy, and essential life skills, fostering cognitive and social-emotional development. Qualified educators employ structured curricula and age-appropriate methodologies to engage young learners.
Through guided instruction, children develop fundamental skills necessary for future academic success. Primary school aims to cultivate a love for learning and prepare students for the more complex challenges of secondary education, all under the careful guidance of dedicated, professional teachers.
Secondary Education: Expanding Knowledge and Skills

Secondary education builds upon the foundations of primary school, offering a more comprehensive and specialized curriculum delivered by specially trained teachers. This phase expands students’ knowledge base across various subjects, fostering critical thinking and problem-solving abilities. Educators utilize diverse pedagogical approaches to cater to different learning styles.
Qualified instructors guide students through increasingly complex concepts, preparing them for either tertiary education or direct entry into the workforce. Secondary school emphasizes skill development alongside academic rigor, ensuring students are well-equipped for future challenges, guided by experienced professionals.
Tertiary Education: Higher Learning and Specialization
Tertiary education, encompassing colleges and universities, represents the pinnacle of formal education, delivered by highly specialized and specially trained teachers – often experts in their fields. This level focuses on in-depth study and research, allowing students to specialize in chosen disciplines. Instruction emphasizes critical analysis, independent thought, and advanced problem-solving.
Professors and instructors guide students through complex theories and practical applications, fostering innovation and preparing them for leadership roles. Tertiary institutions prioritize knowledge creation and dissemination, shaping future professionals and contributing to societal advancement through expert-led learning.
Curriculum in Formal Education
The curriculum within formal education is a carefully planned sequence of learning experiences, delivered by specially trained teachers who are equipped to implement it effectively; This structured approach ensures consistent knowledge transmission and skill development. It’s intentionally designed to meet specific learning objectives and standards, often dictated by educational authorities.

Teachers adapt and interpret the curriculum, utilizing pedagogical expertise to cater to diverse student needs. A well-defined curriculum, coupled with skilled instruction, is crucial for fostering academic growth and preparing students for future success, guided by qualified educators.
Standardized Curriculum vs. Differentiated Instruction
Formal education often presents a tension between a standardized curriculum – ensuring consistent learning outcomes – and differentiated instruction, tailored by specially trained teachers to individual student needs. While standardization provides a common foundation, effective educators recognize diverse learning styles and paces.
Teachers utilize their training to modify content, process, or product, offering varied learning experiences. This balance is key; a rigid curriculum can hinder progress, while a completely individualized approach may lack structure. Skilled teachers navigate this complexity, maximizing student engagement and achievement.
The Importance of Assessment and Evaluation
Within formal education, assessment and evaluation, skillfully implemented by specially trained teachers, are crucial for monitoring student progress and refining instructional strategies. These processes extend beyond simple grading; they provide valuable insights into learning gaps and areas of strength.
Teachers utilize diverse methods – formative and summative – to gauge understanding. Formative assessments, like quizzes and observations, inform ongoing instruction, while summative evaluations, such as exams, measure overall achievement; Effective evaluation drives curriculum adjustments and ensures students master essential skills.
Formal vs. Non-Formal and Informal Education
Formal education distinguishes itself through its structured, hierarchical system and intentionality, delivered by specially trained teachers within recognized institutions like schools and universities. Unlike non-formal education – which offers structured learning outside traditional settings – and informal education, gained through daily experiences, formal learning follows a defined curriculum.
This structured approach, guided by qualified educators, ensures a systematic progression of knowledge. While non-formal and informal learning are valuable, formal education provides credentials and a standardized framework for assessing competency, crucial for societal and economic advancement.
Comparing and Contrasting Educational Approaches
Formal education, characterized by its institutionalized nature, contrasts sharply with non-formal and informal learning. It’s defined by a deliberate, planned curriculum delivered by specially trained teachers, emphasizing systematic knowledge transmission. Non-formal approaches, while structured, lack the same level of accreditation, while informal learning is largely incidental.
The key difference lies in intentionality and assessment. Formal systems prioritize standardized evaluation by qualified instructors, leading to recognized qualifications. This contrasts with the often self-directed nature of informal learning and the skill-focused approach of non-formal programs.
The Interplay Between Different Types of Education
While distinct, formal education, guided by specially trained teachers, doesn’t operate in isolation. It’s significantly enriched by interplay with non-formal and informal learning experiences. Skills honed outside the classroom often complement and reinforce concepts taught within the structured curriculum.
Effective learning often involves a blend; formal instruction provides a foundation, while informal experiences offer practical application and personalized growth. Non-formal programs can bridge gaps in formal education, offering targeted skill development. Ultimately, a holistic approach leverages the strengths of each type, fostering well-rounded individuals.
Advantages of Formal Education
Formal education, delivered by specially trained teachers, offers numerous benefits. It provides a structured, systematic approach to learning, ensuring comprehensive coverage of essential knowledge and skills. This standardized curriculum fosters critical thinking and problem-solving abilities, preparing individuals for higher education and future careers.
Furthermore, formal schooling cultivates discipline, time management, and social interaction skills. Qualified educators provide guidance, mentorship, and personalized support, maximizing student potential. Credentials earned through formal education enhance employability and open doors to opportunities, contributing to both individual and societal advancement.
Disadvantages and Criticisms of Formal Education
Despite its benefits, formal education, even with specially trained teachers, faces criticism. A rigid, standardized curriculum can stifle creativity and cater poorly to diverse learning styles. The emphasis on assessment and grades can induce stress and discourage a genuine love for learning. Some argue it prioritizes rote memorization over practical application.
Furthermore, the system can be slow to adapt to evolving societal needs and technological advancements. Critics also point to potential inequalities in access to quality education and the limitations of a one-size-fits-all approach, hindering individual potential.
The Impact of Formal Education on Society
Formal education, delivered by specially trained teachers, profoundly impacts society. An educated populace fuels economic growth through a skilled workforce, driving innovation and productivity. It fosters informed citizens capable of participating meaningfully in democratic processes and contributing to civic engagement.
Moreover, education promotes social mobility, reduces poverty, and improves public health outcomes. It cultivates critical thinking, problem-solving skills, and cultural understanding, leading to a more tolerant and progressive society. Ultimately, investment in formal education is an investment in a brighter future.
Economic Benefits of an Educated Workforce
Formal education, facilitated by specially trained teachers, directly translates into significant economic advantages. A highly educated workforce possesses enhanced skills, boosting productivity and innovation, leading to higher earning potential for individuals. This, in turn, stimulates economic growth and strengthens national competitiveness in the global market.
Furthermore, educated workers are more adaptable to technological advancements and changing job market demands. Investment in education reduces unemployment rates and fosters entrepreneurship, creating a more robust and resilient economy. Skilled labor attracts foreign investment and drives sustainable development.
Social and Cultural Implications
Formal education, delivered through specially trained teachers, profoundly impacts societal structures and cultural values. It promotes social mobility, offering opportunities for individuals from diverse backgrounds to improve their life circumstances. Education fosters critical thinking, encouraging informed civic engagement and responsible citizenship.

Moreover, it plays a vital role in preserving and transmitting cultural heritage, while simultaneously promoting tolerance and understanding between different groups. A well-educated populace is more likely to embrace diversity, challenge social injustices, and contribute to a more equitable and harmonious society.
Global Trends in Formal Education
Worldwide, formal education systems, reliant on specially trained teachers, are experiencing significant shifts. Increased access to education, particularly in developing nations, remains a primary focus, though disparities persist; Technological integration – online learning platforms, digital resources – is rapidly transforming instructional methods, demanding new teacher skillsets.
There’s a growing emphasis on standardized assessments to measure learning outcomes globally. Simultaneously, a push for culturally relevant pedagogy and inclusive education practices is gaining momentum, requiring teachers to adapt their approaches to diverse student needs and backgrounds.
Access to Education Worldwide
Globally, expanding access to formal education, delivered by specially trained teachers, remains a critical challenge. While enrollment rates have risen, significant inequalities persist based on socioeconomic status, gender, and geographic location. Many regions lack sufficient qualified educators, hindering quality instruction.

Initiatives like UNESCO’s Sustainable Development Goal 4 aim to ensure inclusive and equitable quality education for all. Overcoming barriers – poverty, conflict, discrimination – requires targeted interventions and investment in teacher training and infrastructure, particularly in underserved communities, to ensure equitable learning opportunities.
Technological Integration in Formal Education
The integration of technology is transforming formal education, demanding that specially trained teachers adapt their methodologies. Digital tools offer personalized learning experiences, access to vast resources, and enhanced engagement. However, effective implementation requires adequate infrastructure, digital literacy training for educators, and equitable access for all students.
Teachers must skillfully blend technology with traditional instruction, fostering critical thinking and problem-solving skills. Successful integration isn’t simply about using devices; it’s about leveraging technology to enhance pedagogy and improve learning outcomes, guided by well-prepared instructors.
Future of Formal Education
The future of formal education hinges on adapting to rapidly changing needs and technologies, requiring specially trained teachers equipped for innovative roles. Personalized learning pathways, driven by data analytics and AI, will become more prevalent. Educators will transition from lecturers to facilitators, guiding students through customized learning experiences.

Continuous professional development will be crucial, focusing on digital pedagogy, adaptive learning strategies, and fostering socio-emotional skills. The evolving role of the teacher emphasizes mentorship, critical thinking development, and preparing students for a dynamic future workforce.
Adapting to Changing Needs and Technologies
Formal education must evolve to meet the demands of a technologically driven world, necessitating specially trained teachers proficient in integrating digital tools. This adaptation requires a shift from traditional, content-focused instruction to skills-based learning, emphasizing critical thinking and problem-solving.

Educators need ongoing training in utilizing learning management systems, online resources, and adaptive learning platforms. Furthermore, they must cultivate digital literacy among students, preparing them to navigate and contribute to an increasingly digital society. Personalized learning, facilitated by technology, will become central.
The Evolving Role of the Teacher
The role of specially trained teachers in formal education is transforming from knowledge deliverers to facilitators of learning. They are becoming mentors, guiding students through personalized learning journeys and fostering critical thinking skills. This shift demands educators possess strong pedagogical knowledge and adaptability.
Teachers must embrace technology, utilizing it to enhance instruction and cater to diverse learning styles. Emotional intelligence and the ability to build strong student-teacher relationships are increasingly vital. Continuous professional development is crucial, ensuring educators remain equipped to navigate the evolving educational landscape.