Tyson chicken nuggets offer a convenient, flavorful option for busy meals. These bite-sized pieces combine tender chicken with a crisp coating, ready to transform into a satisfying dish with minimal prep. This guide outlines simple steps to bring out their best taste and texture. Quick tasty bites await soon.
1.1 What Are Tyson Chicken Nuggets?
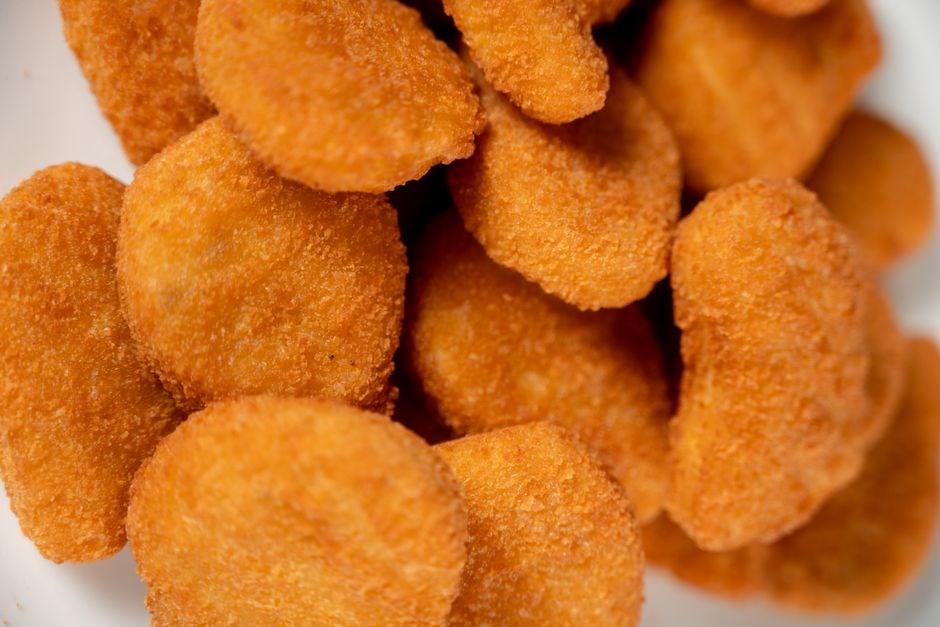
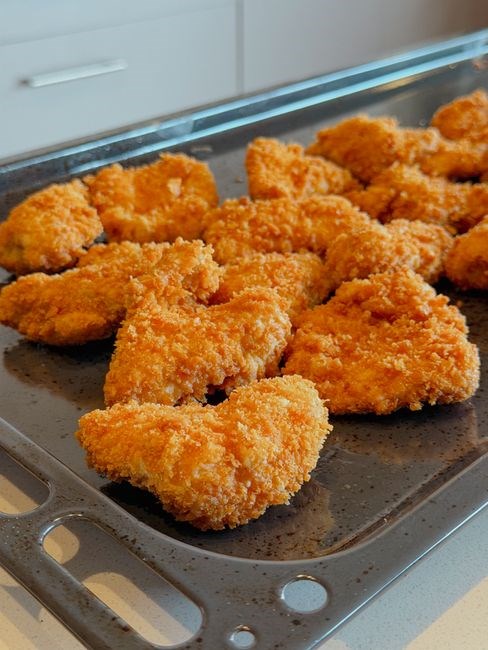
Tyson chicken nuggets are pre‑made, bite‑sized pieces of chicken that come ready to cook. Each nugget is a small, uniform portion of tender chicken breast or thigh meat that has been seasoned, coated in a crunchy batter or breading, and then flash‑frozen to preserve freshness. Company’s manufacturing process ensures that the nuggets retain a consistent texture and flavor profile across batches, making them a reliable choice for families quick meal planners alike. When you open a bag, you’ll find a handful of golden‑brown nuggets that are lightly salted and often infused with a blend of herbs and spices such as paprika, garlic powder, and onion powder. These flavorings give the nuggets a savory, slightly smoky taste that pairs well with a variety of dipping sauces. Tyson’s nuggets are also designed to be versatile: they can be baked, fried, microwaved, or air‑fried, allowing consumers to choose a cooking method that best fits their time constraints and dietary preferences. The product is marketed as a convenient protein source, offering a quick way to add a protein‑rich component to a meal without the need for extensive preparation. In addition to their taste and convenience, Tyson chicken nuggets are often highlighted for their affordability and accessibility, as they are widely available in supermarkets, grocery stores, and even some fast‑food outlets. While they are a processed food item, the company has taken steps to improve the nutritional profile of its products, including reducing sodium content in certain lines and offering options that are lower in fat. Consumers looking for a quick, tasty, and dependable protein option will find Tyson chicken nuggets to be a practical solution that can be incorporated into a variety of dishes, from classic fries and ketchup to more elaborate recipes like stuffed peppers or casserole mixes. Whether you’re preparing a family dinner, a school lunch, or a snack for a movie night, these nuggets provide a straightforward, flavorful choice that meets the demands of modern, on‑the‑go lifestyles Enjoy cooking with family!

Ingredients and Equipment
To cook Tyson chicken nuggets, gather the following items: a baking sheet, parchment paper, an oven or air fryer, a mixing bowl, a whisk, and a timer. Ensure the oven is preheated to 400°F (204°C). Place nuggets on the sheet, spread evenly, and bake for 15 minutes. Keep the nuggets at minute before cooking.
2.1 List of Ingredients
Below is a concise list of ingredients needed to cook Tyson chicken nuggets at home. Each item is essential for achieving a crispy exterior and juicy interior.
- Tyson Chicken Nuggets: 1 lb (16–18 pieces)
- All‑Purpose Flour: 1 cup
- Parmesan Cheese: ¼ cup grated
- Breadcrumbs: ½ cup
- Egg Whites: 2 large
- Olive Oil: 2 tbsp
- Salt: ½ tsp
- Black Pepper: ¼ tsp
With these ingredients, you can proceed to season and cook the nuggets for a delicious meal.
Before you begin, ensure your oven or air fryer is preheated to the recommended temperature. Keep the nuggets on a parchment‑lined tray or a silicone mat to prevent sticking. If using an air fryer, lightly spray the basket with oil to achieve maximum crispness. For a healthier option, bake the nuggets at 400 °F (204 °C) for 15 minutes, flipping halfway through.
Let the nuggets rest after baking; this sets the coating and keeps juices from spilling. Store leftovers in container fridge for up to 3 days!
For a burst of flavor, sprinkle a teaspoon of smoked paprika or a pinch of cayenne pepper over the coated nuggets before baking. If you prefer a sweeter glaze, brush the nuggets with a mixture of honey and soy sauce during the last 5 minutes of baking. For a crunchy twist, coat the nuggets in crushed cornflakes before air fryer. These variations let you tailor the dish to your taste preferences and keep the cooking process fun and creative.
Preparation Steps
First, preheat your oven to 400°F (204°C). While it heats, set up a dredging station: place flour, beaten egg whites, and a mix of breadcrumbs and Parmesan in separate shallow dishes. Coat each nugget lightly, then dip in egg, then flour, and finally breadcrumbs. Enjoy the crunch!!!!!!
3.1 Seasoning the Nuggets
Seasoning Tyson chicken nuggets is a quick yet crucial step that can elevate the flavor profile from plain to memorable. Begin by selecting a blend of spices that complements the mildness of the chicken while adding depth. A classic mix might include 1 teaspoon of garlic powder, 1 teaspoon of onion powder, ½ teaspoon of smoked paprika, ¼ teaspoon of cayenne pepper for a subtle heat, and ½ teaspoon of dried thyme. For a savory twist, add 1 teaspoon of grated Parmesan cheese and a pinch of salt and black pepper to taste. If you prefer a smoky flavor, substitute the smoked paprika with regular paprika and add a dash of liquid smoke. For those who love a bit of sweetness, sprinkle 1 teaspoon of brown sugar or honey powder. Mix all dry ingredients in a shallow bowl until evenly distributed. Place the nuggets in a large zip‑lock bag or a shallow dish, pour the seasoning mixture over them, shake or toss gently until each piece is coated. Let the seasoned nuggets rest for about 5 minutes; this allows the flavors to penetrate the meat. If you’re in a hurry, you can skip the resting period, but the extra time will result in a more robust taste. Once seasoned, the nuggets are ready for your chosen cooking method, whether baking, air‑frying, or pan‑frying. The seasoning not only enhances taste but also helps create a crisp exterior when cooked. Enjoy the aroma and flavor that comes from a batch of Tyson chicken nuggets. Pair the seasoned nuggets with a homemade sauce of Greek yogurt, herbs, lemon zest, and honey, balancing savory notes and adding a refreshing finish for a bite
Cooking Methods
Tyson chicken nuggets can be cooked in several ways, each giving a distinct texture. Traditional baking yields a crispy exterior, while air‑frying offers a lighter crunch with fewer calories. Pan‑frying adds a golden finish, and microwaving provides a quick, tender option. Enjoy a crispy, flavorful bite.!!
4.1 Baking
Start by preheating your oven to 425°F (220°C). While the oven warms, line a baking sheet with parchment paper or a silicone mat to prevent sticking. Arrange the Tyson chicken nuggets in a single layer, ensuring they do not touch, which allows even heat distribution. For an extra crisp, lightly spray or brush the nuggets with a neutral oil, such as canola or vegetable, though the coating is usually sufficient. Place the sheet in the center of the oven and bake for 12–15 minutes, flipping the nuggets halfway through to achieve a uniform golden‑brown exterior. If you prefer a more caramelized finish, increase the temperature to 450°F (232°C) for the last 2–3 minutes, but keep a close eye to avoid burning. The internal temperature should reach 165°F (74°C) for safe consumption. Once baked, remove the nuggets from the oven and let them rest for a minute; this helps the coating set and prevents sogginess. Serve immediately with your choice of dipping sauces or incorporate them into salads, wraps, or bowls for a versatile meal. Properly baked nuggets retain moisture inside while delivering a satisfying crunch on the outside, making them a reliable go‑to option for quick dinners or snack times. Enjoy the comforting blend of seasoned chicken and crispy coating that only a well‑executed bake can provide. Whether served as a quick family dinner, a party snack, or a component of a larger meal, these nuggets pair well with fresh salads, crunchy slaws, or creamy dips, offering a versatile and satisfying culinary experience. savory crunch ages.
Cooking Methods (continued)
Explore alternative techniques like pan‑frying, sautéing, or microwaving to suit your schedule. Each method offers distinct texture and flavor nuances, allowing you to customize crispness and moisture while keeping preparation time minimal and results delicious quickly now!.
5.1 Air Frying
Air frying Tyson chicken nuggets delivers a crisp exterior while preserving juiciness, making it a healthier alternative to deep‑frying. Follow these steps to achieve optimal results:
- Preheat the air fryer to 400°F (204°C) for 3 minutes. This ensures even heat distribution.
- Arrange the nuggets in a single layer on the basket. Avoid overcrowding; use a second batch if necessary.
- Cook for 8–10 minutes, shaking the basket halfway through to promote uniform browning.
- Check the internal temperature; it should reach 165°F (74°C) for safe consumption.
- Optional spray a light mist of cooking oil to enhance crunchiness.
For extra flavor, toss the cooked nuggets in a seasoned coating—such as a blend of paprika, garlic powder, and a pinch of salt—before serving. Pair them with your favorite dipping sauce or a fresh salad for a balanced meal. The air‑fried nuggets remain tender inside and crisp outside, offering a satisfying texture that satisfies both kids and adults alike.
Tip: If you prefer a spicier kick, sprinkle a teaspoon of cayenne pepper or a dash of smoked paprika over the nuggets before air‑frying. For a variation, lightly coat the nuggets in crushed cornflakes or panko breadcrumbs prior to cooking. After air‑frying, let the nuggets rest for a minute to lock in moisture, then serve immediately with your chosen sauce.
Enjoy the crispy nuggets as a quick snack or meal now! today.!!
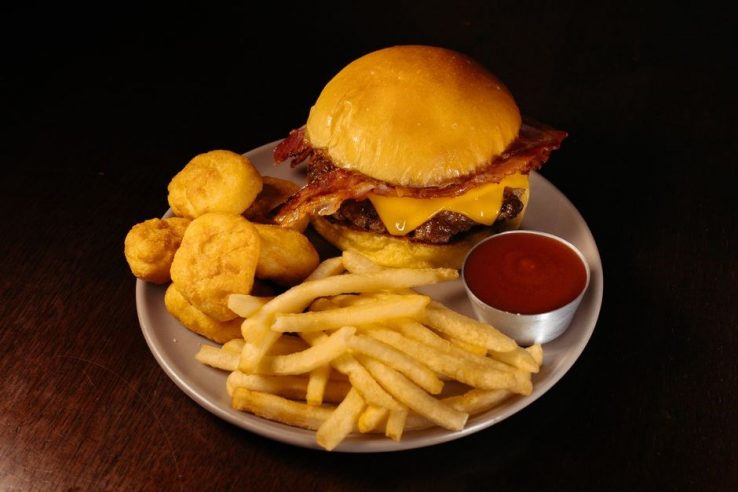
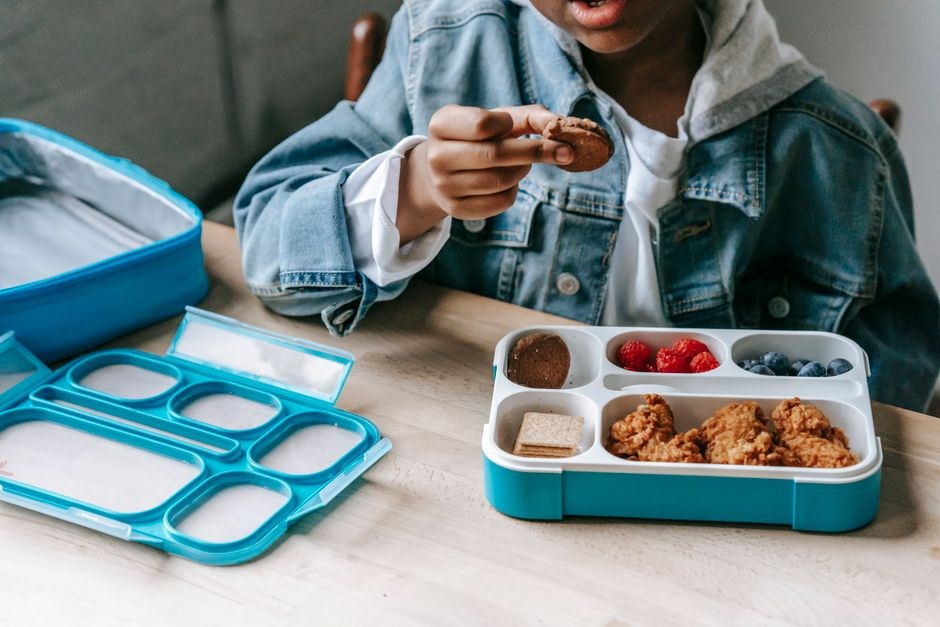
Serving Suggestions
Serve Tyson nuggets with a variety of dips—ketchup, honey mustard, or a spicy aioli. Pair them with a crisp green salad or steamed veggies for balance. For a hearty option, toss them into a pasta salad or a sandwich with fresh lettuce and tomato. EnjoyServe hot for best taste, now!
6.1 Recommended Sauces
When pairing Tyson chicken nuggets, choose sauces that enhance their savory profile without overpowering the mild chicken. A classic choice is a tangy ketchup, which offers a sweet and acidic contrast. For a richer option, try a creamy honey mustard—mix equal parts honey, Dijon mustard, and a splash of mayonnaise, then whisk until smooth. A spicy sriracha mayo adds heat; blend sriracha with mayo, a squeeze of lime, and a pinch of salt. A yogurt-based ranch is light and cooling—combine Greek yogurt, chopped dill, minced garlic, lemon juice, and a dash of pepper. For an Asian twist, whisk soy sauce, sesame oil, rice vinegar, and a touch of brown sugar; finish with crushed garlic and ginger. A smoky barbecue sauce, made from tomato base, smoked paprika, and a hint of molasses, pairs well for a barbecue flavor. If you prefer a sweet glaze, caramelize honey with butter and a dash of soy sauce, then brush over the nuggets before serving. Each sauce can be served warm or at room temperature, and small bowls allow diners to choose their favorite. Pair sauces with fresh dipping options like cucumber yogurt dip or a tangy pickled relish for extra crunch. Experimenting with these sauces can transform a simple nugget meal into a gourmet experience. To elevate the flavor profile, consider a homemade garlic aioli: whisk mayo, minced garlic, lemon zest, and a pinch of cayenne pepper. A drizzle of honey mustard adds sweetness. Sprinkle sesame seeds over the nuggets before serving. A dash of smoked paprika adds a subtle depth aroma!!
Storage and Reheating
Store cooked nuggets in a sealed container for up to 4 days in the fridge. For longer storage, freeze them in a single layer on a sheet, then transfer to a freezer bag; they stay fresh for 3 months. Reheat in a 350°F oven for 10 minutes or in an air fryer at 375°F for 5 minutes. Serve hot. Keep them chilled.!!
7.1 How to Store
When storing, use a shallow tray to allow air circulation, which helps keep the nuggets crisp; avoid stacking them too tightly, as this can cause moisture buildup and sogginess. Keep them in a cool, dry place and discard if any off odor or discoloration appears. For optimal shelf life, reheat once, not multiple times, to preserve texture. Always ensure the internal temperature reaches 165°F (74°C) before serving, and keep a thermometer handy. Enjoy them fresh. And stay safe!Keep it cold.
After the initial cooking, the nuggets can be stored in a tightly sealed container to preserve their crispness. If you plan to keep them for a few days, place them in the refrigerator; the cool environment slows bacterial growth and keeps the coating intact. For longer preservation, freeze the nuggets in a single layer on a parchment-lined tray, then transfer them to a freezer bag once frozen. This method prevents clumping and maintains texture. When you’re ready to reheat, avoid microwaving for extended periods, as the high heat can make the coating soggy. Instead, preheat your oven to 350°F (175°C) and bake the nuggets for 10 minutes, or use an air fryer at 375°F (190°C) for 5 minutes. Both methods yield a crunchy exterior and a juicy interior. If you prefer a quick option, a skillet on medium heat will also work; just add a splash of oil and cook until golden brown. Always check that the internal temperature reaches 165°F (74°C) before serving to ensure safety. For added flavor, sprinkle a pinch of paprika or garlic powder before reheating. Store any leftovers in an airtight container and consume within 4–5 days for optimal taste. Remember to label the date on the container so you can track freshness yes.