
A Field Guide to the Mammals of Australia: Article Plan
This comprehensive guide details identification keys‚ species accounts‚ distribution maps‚ and field techniques for observing Australia’s 300+ mammal species‚
featuring high-quality photographs.
Australia’s mammalian fauna is remarkably diverse‚ encompassing iconic species and lesser-known treasures. This field guide serves as an essential resource for both amateur naturalists and seasoned researchers seeking to identify and understand these creatures.
It provides a structured approach‚ blending detailed species profiles with practical field techniques.
The guide aims to foster appreciation and contribute to the conservation of Australia’s unique mammals.
Geographic Coverage of Australian Mammals
This guide encompasses the entire Australian continent‚ including Tasmania‚ and adjacent islands. Mammal distributions vary greatly‚ influenced by climate‚ habitat‚ and historical factors. Coverage extends from the tropical rainforests of Queensland to the arid landscapes of the Outback‚ and the temperate zones of Victoria.
Detailed distribution maps illustrate species ranges.
Classification and Taxonomy
Australian mammals are broadly categorized into three groups: marsupials‚ placental mammals‚ and monotremes. This guide utilizes a modern taxonomic framework‚ reflecting current scientific understanding. Keys are provided for difficult-to-identify groups like small marsupials‚ rodents‚ and bats. Nomenclature follows established conventions‚ aiding accurate species recognition.
Marsupials: A Defining Feature
Australia’s iconic marsupials‚ including kangaroos‚ wallabies‚ koalas‚ and possums‚ represent a significant portion of its mammalian fauna. This section details their unique reproductive strategies and diverse adaptations. Identification keys specifically target challenging marsupial genera‚ aiding accurate field identification for both novice and experienced observers.
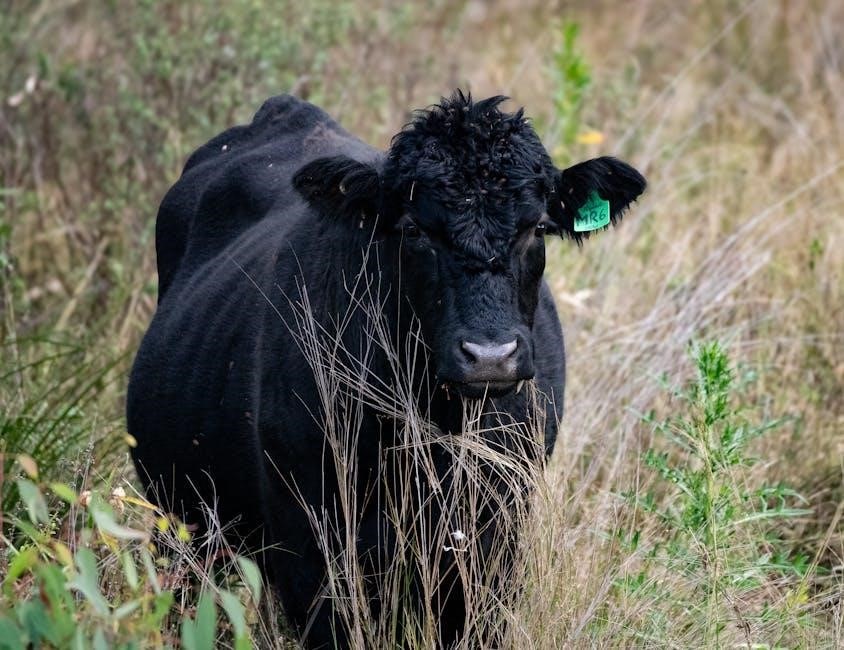
Placental Mammals: Introduced and Native
While marsupials dominate‚ Australia also hosts native placental mammals like bats and rodents‚ alongside introduced species such as dingoes and feral pigs. This section examines their ecological roles and identification challenges. Detailed characteristics help differentiate between similar-looking rodents and bat species‚ crucial for accurate surveys.
Monotremes: Australia’s Unique Egg-Layers
Australia uniquely harbors monotremes – the echidna and platypus – mammals that lay eggs! This section details their distinctive features‚ including the platypus’s bill and webbed feet‚ and the echidna’s spines. Identification focuses on habitat‚ behavior‚ and subtle morphological differences‚ vital for conservation efforts.
How to Use a Mammal Field Guide
Effectively utilizing this guide requires understanding its components. We’ll explain how to navigate identification keys – crucial for challenging groups like bats and rodents – and how to interpret distribution maps showing species ranges. Mastering these tools unlocks accurate mammal identification in the field‚ enhancing observation skills.
Understanding Identification Keys
Identification keys present a series of choices leading to species identification. Carefully read each paired statement‚ selecting the option that best matches the specimen. Follow the corresponding number or letter to the next step‚ continuing until a species is reached. Accuracy relies on precise observation of key characteristics.
Interpreting Distribution Maps
Distribution maps visually represent a species’ geographic range. Solid colors indicate confirmed presence‚ while stippled areas suggest possible or historical occurrences. Pay attention to range overlap‚ indicating potential competition or coexistence. Endemic species have restricted ranges‚ highlighting conservation needs. Maps aid in predicting likely sightings.
Field Characters for Mammal Identification
Accurate identification relies on observing key physical traits. Pelage characteristics – color‚ texture‚ and patterns – are crucial. Skeletal features and dental formulas‚ though requiring expertise‚ offer definitive clues. Track and sign identification‚ including scat and footprints‚ provide valuable evidence when direct observation is limited.
Pelage (Fur) Characteristics
Fur color variations – from the grey of kangaroos to the reddish hues of some possums – are primary identifiers. Texture‚ whether soft‚ coarse‚ or spiny‚ is also key. Patterns‚ like stripes or spots‚ further differentiate species. Seasonal changes in pelage should be considered during observation.
Skeletal Features & Dental Formula
Skeletal details‚ observable in skulls or roadkill‚ reveal crucial taxonomic information. Dental formulas – the number and arrangement of incisors‚ canines‚ premolars‚ and molars – are definitive for species identification. Jaw structure and tooth shape reflect dietary adaptations‚ aiding in classification.
Track and Sign Identification
Mammal tracking involves recognizing footprints‚ scats‚ diggings‚ and browse marks. Footprint morphology – size‚ shape‚ and toe arrangement – distinguishes species. Scat analysis reveals diet‚ while rub marks indicate territorial behavior. Burrow systems and feeding signs provide valuable clues to presence and activity.
Identifying Mammals Quickly: Initial Assessment
Rapid identification begins with observing size and shape – is it large or small‚ slender or robust? Habitat provides crucial context; rainforests host different species than arid zones. Behavior – nocturnal or diurnal‚ solitary or social – narrows possibilities. These initial observations guide further investigation.
Size and Shape
Initial assessment relies heavily on a mammal’s overall dimensions and body form. Is the animal diminutive‚ like a honey possum‚ or substantial‚ such as a kangaroo? Note whether it’s elongated and streamlined‚ or compact and powerfully built. These basic morphological traits significantly refine identification possibilities.
Habitat and Behaviour
Observing where a mammal is encountered and how it acts provides crucial clues. Is it arboreal‚ terrestrial‚ or marine? Nocturnal or diurnal habits narrow down options. Understanding foraging strategies – browsing‚ digging‚ or predation – further assists in accurate species determination within the Australian landscape.
Species Accounts: Detailed Profiles
Each species receives a dedicated profile encompassing nomenclature‚ size‚ and detailed distribution information. Habitats and behaviors are thoroughly described‚ aiding field identification. These accounts‚ coupled with accompanying visuals‚ provide a comprehensive resource for understanding Australia’s diverse mammal fauna‚ from kangaroos to bats.
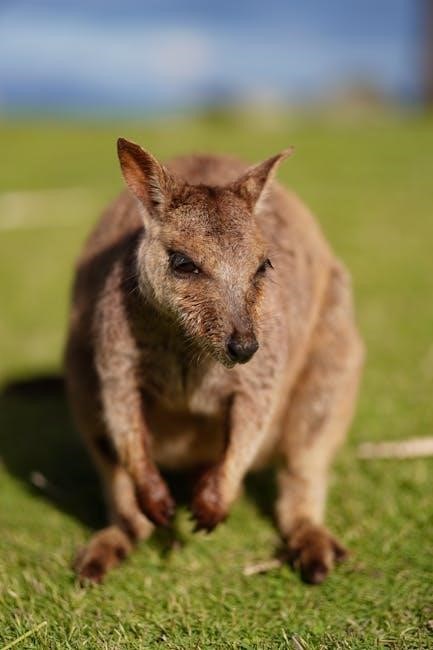
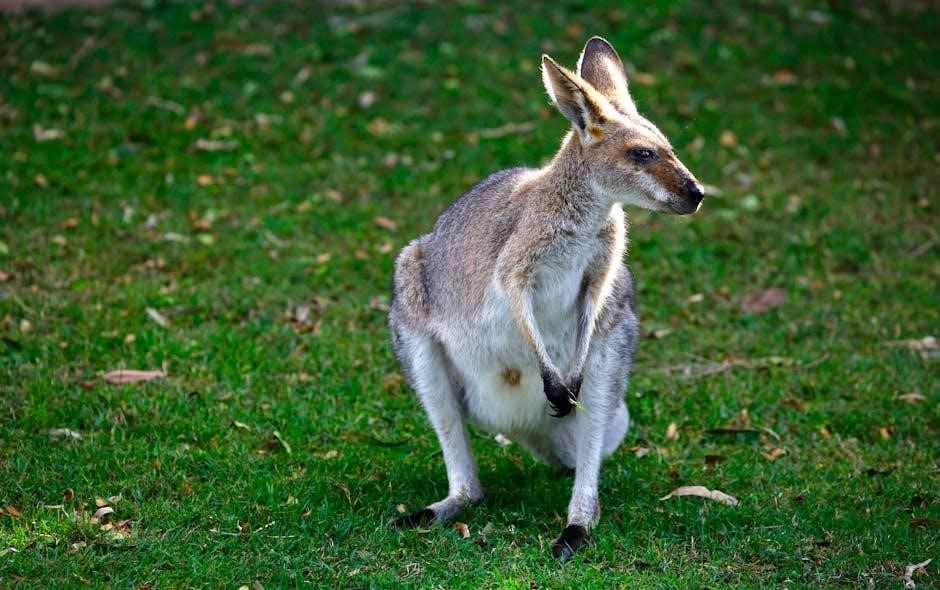
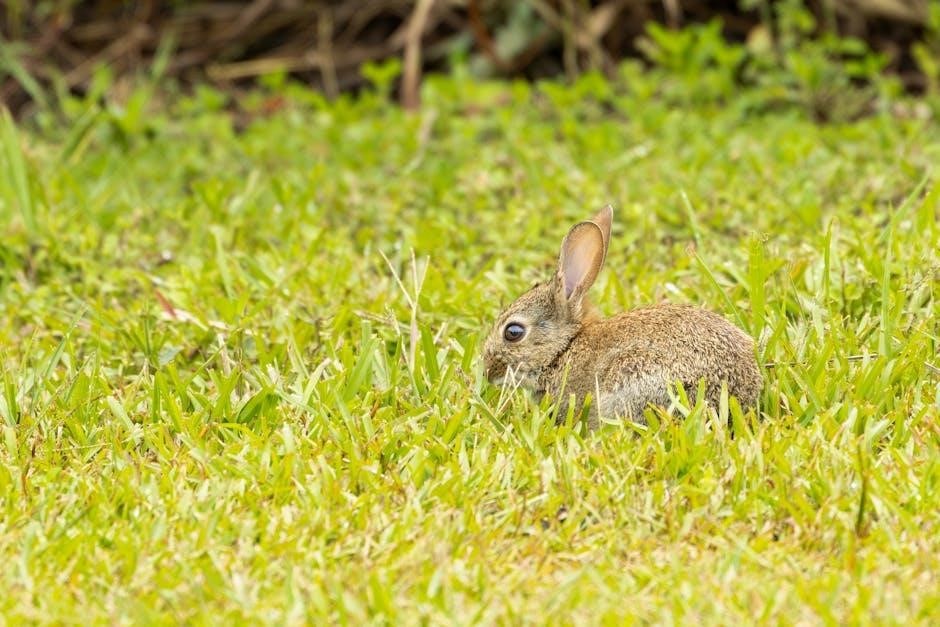
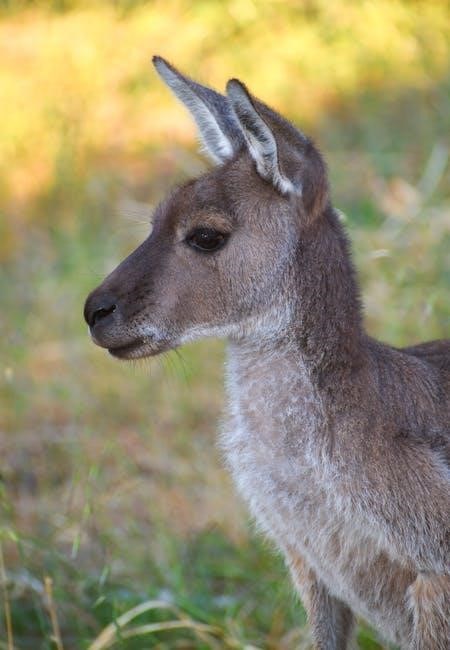
Kangaroos and Wallabies
This section details the diverse kangaroo and wallaby species‚ covering their varying sizes‚ pelage characteristics‚ and habitat preferences. Identification focuses on key features like leg structure and facial markings. Distribution maps illustrate range overlaps‚ while behavioral notes aid observation in the field‚ enhancing understanding.
Koalas and Wombats
Detailed profiles of koalas and wombats explore their specialized diets‚ arboreal or terrestrial lifestyles‚ and unique morphological adaptations. Identification relies on fur color‚ ear shape‚ and body size. Habitat descriptions pinpoint eucalyptus forests and burrow systems‚ aiding field recognition and conservation efforts.
Possums and Gliders
This section provides keys to differentiate between various possum and glider species‚ focusing on pelage patterns‚ tail length‚ and gliding membrane presence. Detailed accounts cover nocturnal habits‚ dietary preferences‚ and habitat associations – crucial for accurate field identification and understanding their ecological roles.
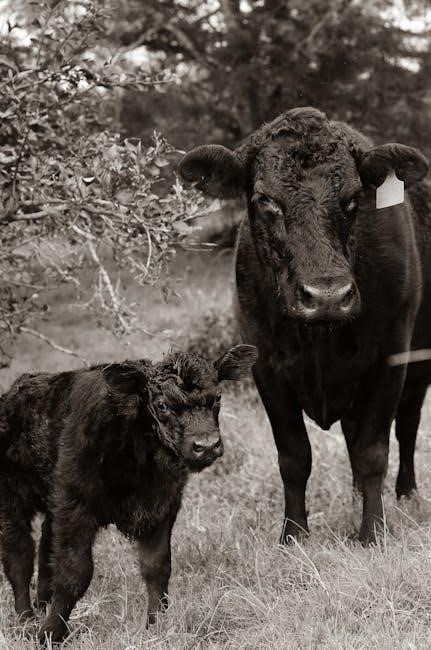
Plates: Visual Identification Aids
This section showcases high-quality photographs from Australia’s top nature photographers‚ alongside detailed illustrations highlighting key features for species differentiation. These visual aids are essential for quick‚ confident identification in the field‚ complementing species descriptions and distribution maps for a holistic approach.
High-Quality Photographs
The guide incorporates stunning‚ detailed photographs capturing mammals in their natural habitats. These images‚ sourced from leading Australian nature photographers‚ are crucial for visual identification‚ showcasing variations in pelage‚ size‚ and posture. They aid in distinguishing similar species and enhance field observation skills.
Illustrations of Key Features
Complementing the photographs‚ detailed illustrations highlight crucial identification characteristics often missed in images. These include skeletal structures‚ dental formulas‚ and foot morphology. Such visual aids are particularly valuable for differentiating closely related species and understanding anatomical distinctions‚ improving accurate species recognition.
Field Techniques for Finding Mammals
Successful mammal observation requires strategic approaches. This section details nocturnal survey methods – spotlighting‚ camera trapping – and diurnal observation strategies‚ focusing on habitat assessment and behavioral cues. Understanding animal habits and employing appropriate techniques significantly increases encounter rates during fieldwork and research.
Nocturnal Surveys
Many Australian mammals are most active at night‚ necessitating nocturnal surveys. Techniques include spotlighting – carefully scanning habitats with a bright light – and utilizing camera traps to remotely record animal presence. These methods require patience‚ quiet movement‚ and awareness of potential disturbance to wildlife.
Diurnal Observation Strategies
Observing mammals during daylight hours demands a different approach. Focus on identifying tracks‚ scat‚ and other signs of activity. Scan open areas for grazing kangaroos and wallabies‚ and patiently observe tree canopies for arboreal species like koalas. Utilize binoculars for detailed observation.
How Mammals are Measured: Standard Metrics
Accurate measurements are crucial for species identification and monitoring. Standard metrics include body length (from nose to rump)‚ tail length‚ and weight—obtained via capture or estimation. Cranial measurements‚ like skull length‚ provide further taxonomic data‚ aiding in detailed species profiling and research.
Body Length
Body length‚ measured from the nose tip to the rump‚ is a fundamental metric. It’s typically recorded in millimeters or centimeters‚ providing a baseline for size comparison. Variations exist due to age and sex; therefore‚ detailed notes accompany each measurement for accurate species assessment and data analysis.
Tail Length
Tail length‚ measured from the base to the tip‚ is crucial as it varies significantly between species – from long and prehensile to short and vestigial. Measurements‚ recorded in millimeters or centimeters‚ aid in identification‚ especially within similar genera‚ and contribute to overall body proportion assessments.
Weight and Cranial Measurements
Weight‚ typically in grams or kilograms‚ provides a general size indicator‚ though it fluctuates with age and condition. Cranial measurements – like condylobasal length – are more consistent and vital for taxonomic classification‚ especially for museum specimens or skeletal remains‚ aiding precise species determination.
Distribution Maps: Visualizing Ranges
Detailed maps illustrate each species’ geographic range‚ highlighting endemic distributions and areas of overlap; These visualizations are crucial for understanding conservation status and potential threats. Maps reveal range limitations‚ fragmentation‚ and areas requiring focused monitoring efforts to protect vulnerable populations effectively.
Endemic Species Distributions
Australia boasts a remarkable number of mammals found nowhere else on Earth. Maps specifically detail the restricted ranges of these endemic species‚ such as certain wallaby and rodent varieties. Understanding these unique distributions is vital for targeted conservation‚
as these animals face heightened extinction risks.
Range Overlap and Conservation Concerns
Distribution maps highlight areas where multiple species’ ranges intersect‚ revealing potential competition or hybridization zones. This overlap is crucial for assessing conservation priorities‚ particularly where threatened species face habitat loss or introduced predators.
Understanding these dynamics informs effective management strategies.
Marine Mammals of Australia
Australia’s coastal waters teem with diverse marine mammals‚ including majestic whales and playful dolphins. The guide details identification of seals‚ sea lions‚ and the vulnerable dugong‚ often found stranded on beaches.
Keys aid in species recognition‚ crucial for conservation efforts and reporting sightings.
Whales and Dolphins
This section provides detailed profiles of Australian whale and dolphin species‚ covering identification based on size‚ markings‚ and behaviour. It includes information on migratory patterns‚ feeding habits‚ and conservation status.
Identification keys assist in distinguishing between similar species encountered at sea or ashore.
Seals and Sea Lions
This guide features comprehensive coverage of Australia’s seal and sea lion populations‚ detailing key identification features like coat colour‚ size‚ and facial characteristics. It explores breeding colonies‚ haul-out sites‚ and foraging behaviours.
Information on distinguishing between species washed ashore is also included.
Dugongs
The field guide provides essential information for identifying dugongs‚ Australia’s iconic marine mammal. It details their unique morphology‚ including body shape‚ flippers‚ and tail. Coverage extends to habitat preferences‚ feeding habits within seagrass beds‚ and conservation status‚
assisting in responsible observation.
Small Mammals: Rodents and Bats
Identifying Australia’s rodents and bats presents unique challenges due to their size and subtle differences. The guide offers specialized identification keys‚ focusing on pelage‚ skeletal features‚ and dental formulas. Detailed characteristics aid differentiation‚
crucial for accurate species recognition in the field‚ alongside distribution insights.
Identification Challenges
Small mammal identification often requires expertise; subtle morphological differences and overlapping ranges complicate field work. Accurate species determination demands careful attention to detail‚ utilizing keys for genera of rodents‚ bats‚ and small marsupials.
Distinguishing similar species necessitates practice and comparative analysis.
Key Characteristics for Differentiation
Focus on pelage color‚ size‚ and dental formulas when identifying small mammals. Observe skull features and track patterns for clues. Detailed species descriptions‚ coupled with high-quality photographs‚ are crucial for accurate differentiation in the field. Habitat and behavioral observations also aid in narrowing possibilities.
Acknowledgments and Further Resources
We extend gratitude to contributing experts and photographers for their invaluable assistance. For continued learning‚ explore recommended reading materials and reputable websites dedicated to Australian fauna. These resources provide deeper insights into mammal biology‚ conservation‚ and identification techniques‚ enhancing field study experiences.
Contributors and Experts
This guide benefited immensely from the expertise of numerous field biologists‚ zoologists‚ and dedicated naturalists across Australia. Their contributions included species account verification‚ distribution data refinement‚ and photographic support. We acknowledge their commitment to advancing mammal knowledge and conservation efforts nationwide.
Recommended Reading and Websites
For further exploration‚ consult “A Naturalist’s Guide to the Mammals of Australia” by Rowland & Farrell‚ and Menkhorst’s “Field Guide to Mammals of Australia.” Online resources include the Australian Museum and Parks Australia websites‚ offering detailed species information and conservation updates.